Lecture: Photosynthesis
Watch the lecture. Read the chapter and complete the study guide in preparation for Exam 2.
I recommend completing the Cellular Respiration module before the Photosynthesis module.
Lab: Photosynthesis and Cellular Respiration
This is a ‘wet’ lab, meaning you will be conducting (and documenting) an experiment analyzing the effects of photosynthesis on leaves. Sounds boring, but it is pretty awesome.
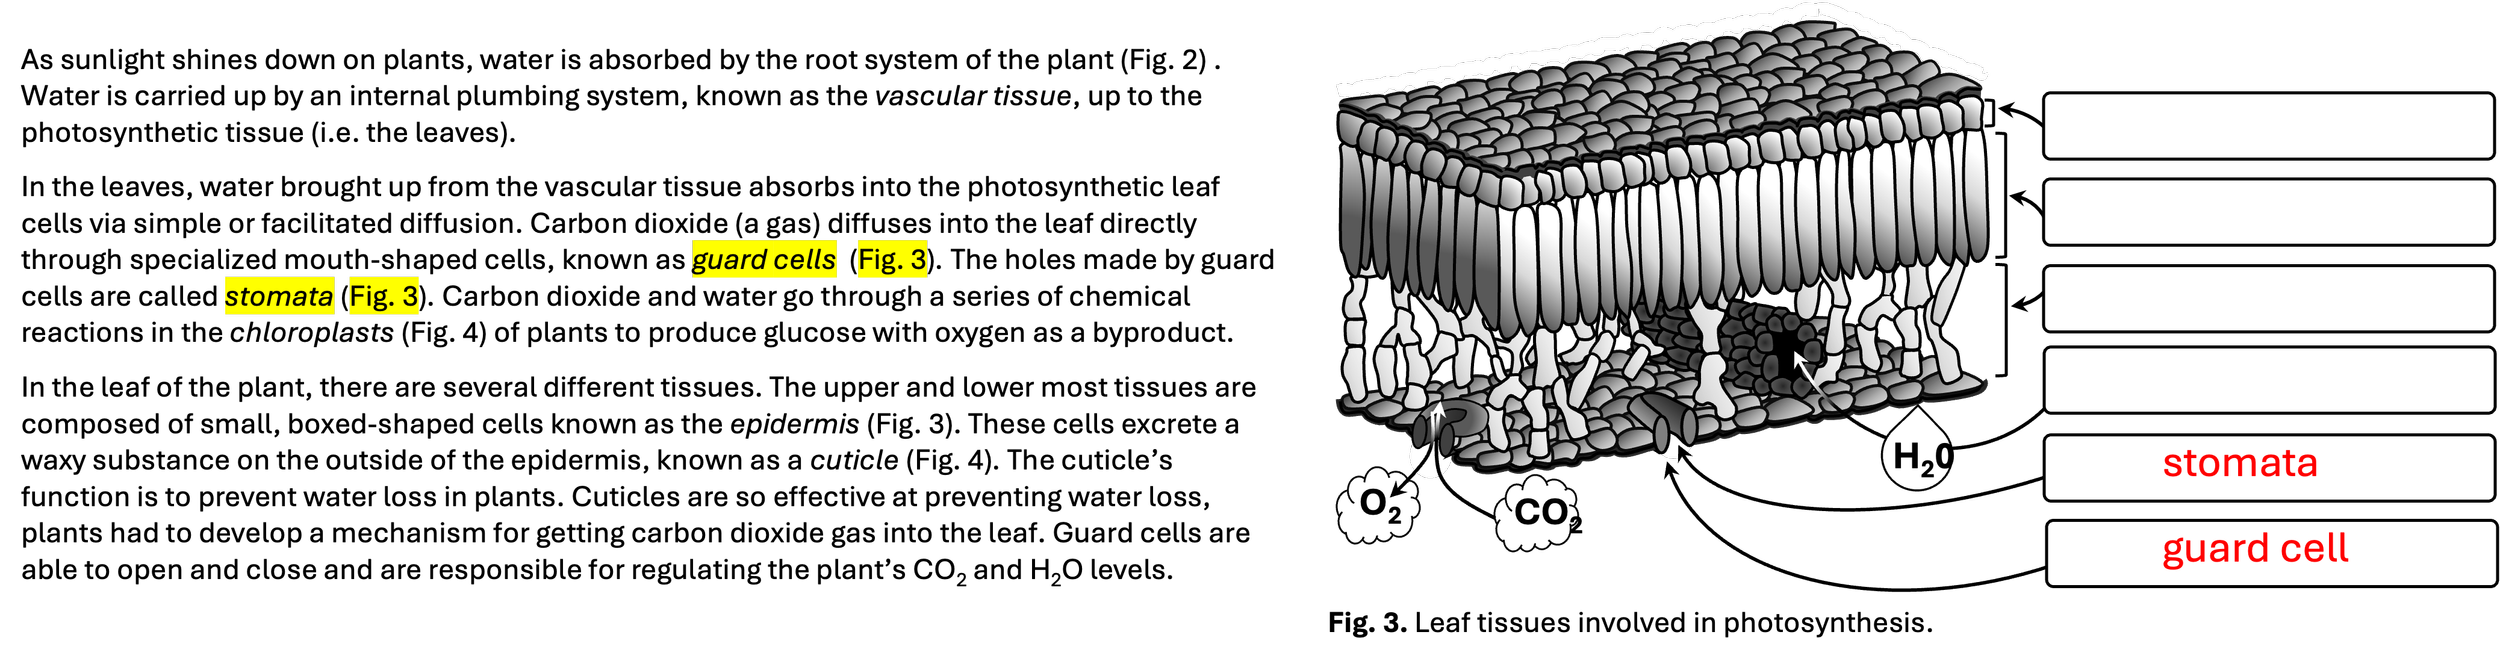
Exercise A & B: Photosynthesis and the Chloroplast
Use the information in the reading to help identify the structures. Look for the figure call outs and refer to the structure mention in italics within the sentence.
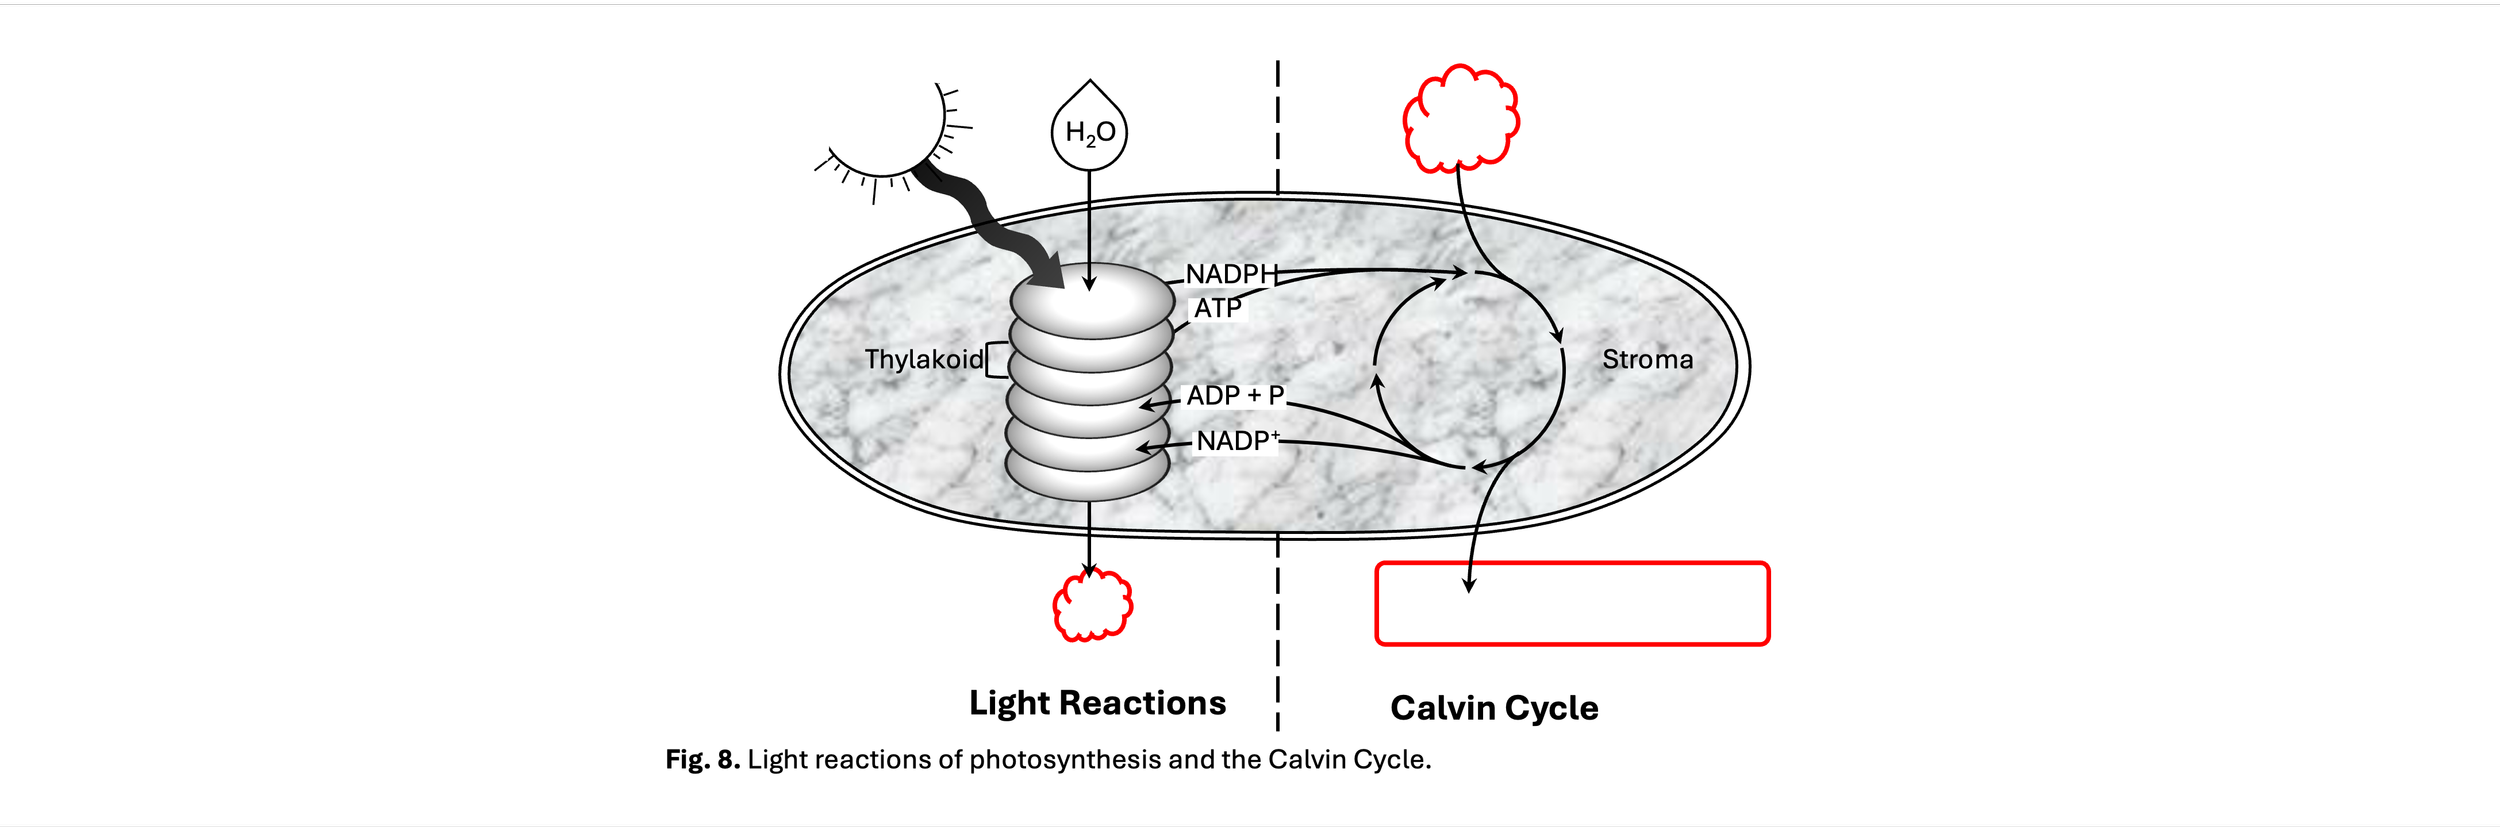
Exercise C: Light reactions and the Calvin Cycle
Just a few points of clarification for commonly made mistakes for this portion of the lab.
In Figure 8, be sure to input the modules coming in and going out of both the Light Reactions and Calvin Cycle (highlighted in red below).
In Question 10, follow the elements in photosynthesis. Identify and label which part of photosynthesis each came from. See an example for hydrogen below.

Experiment: Investigating Photosynthesis and Respiration
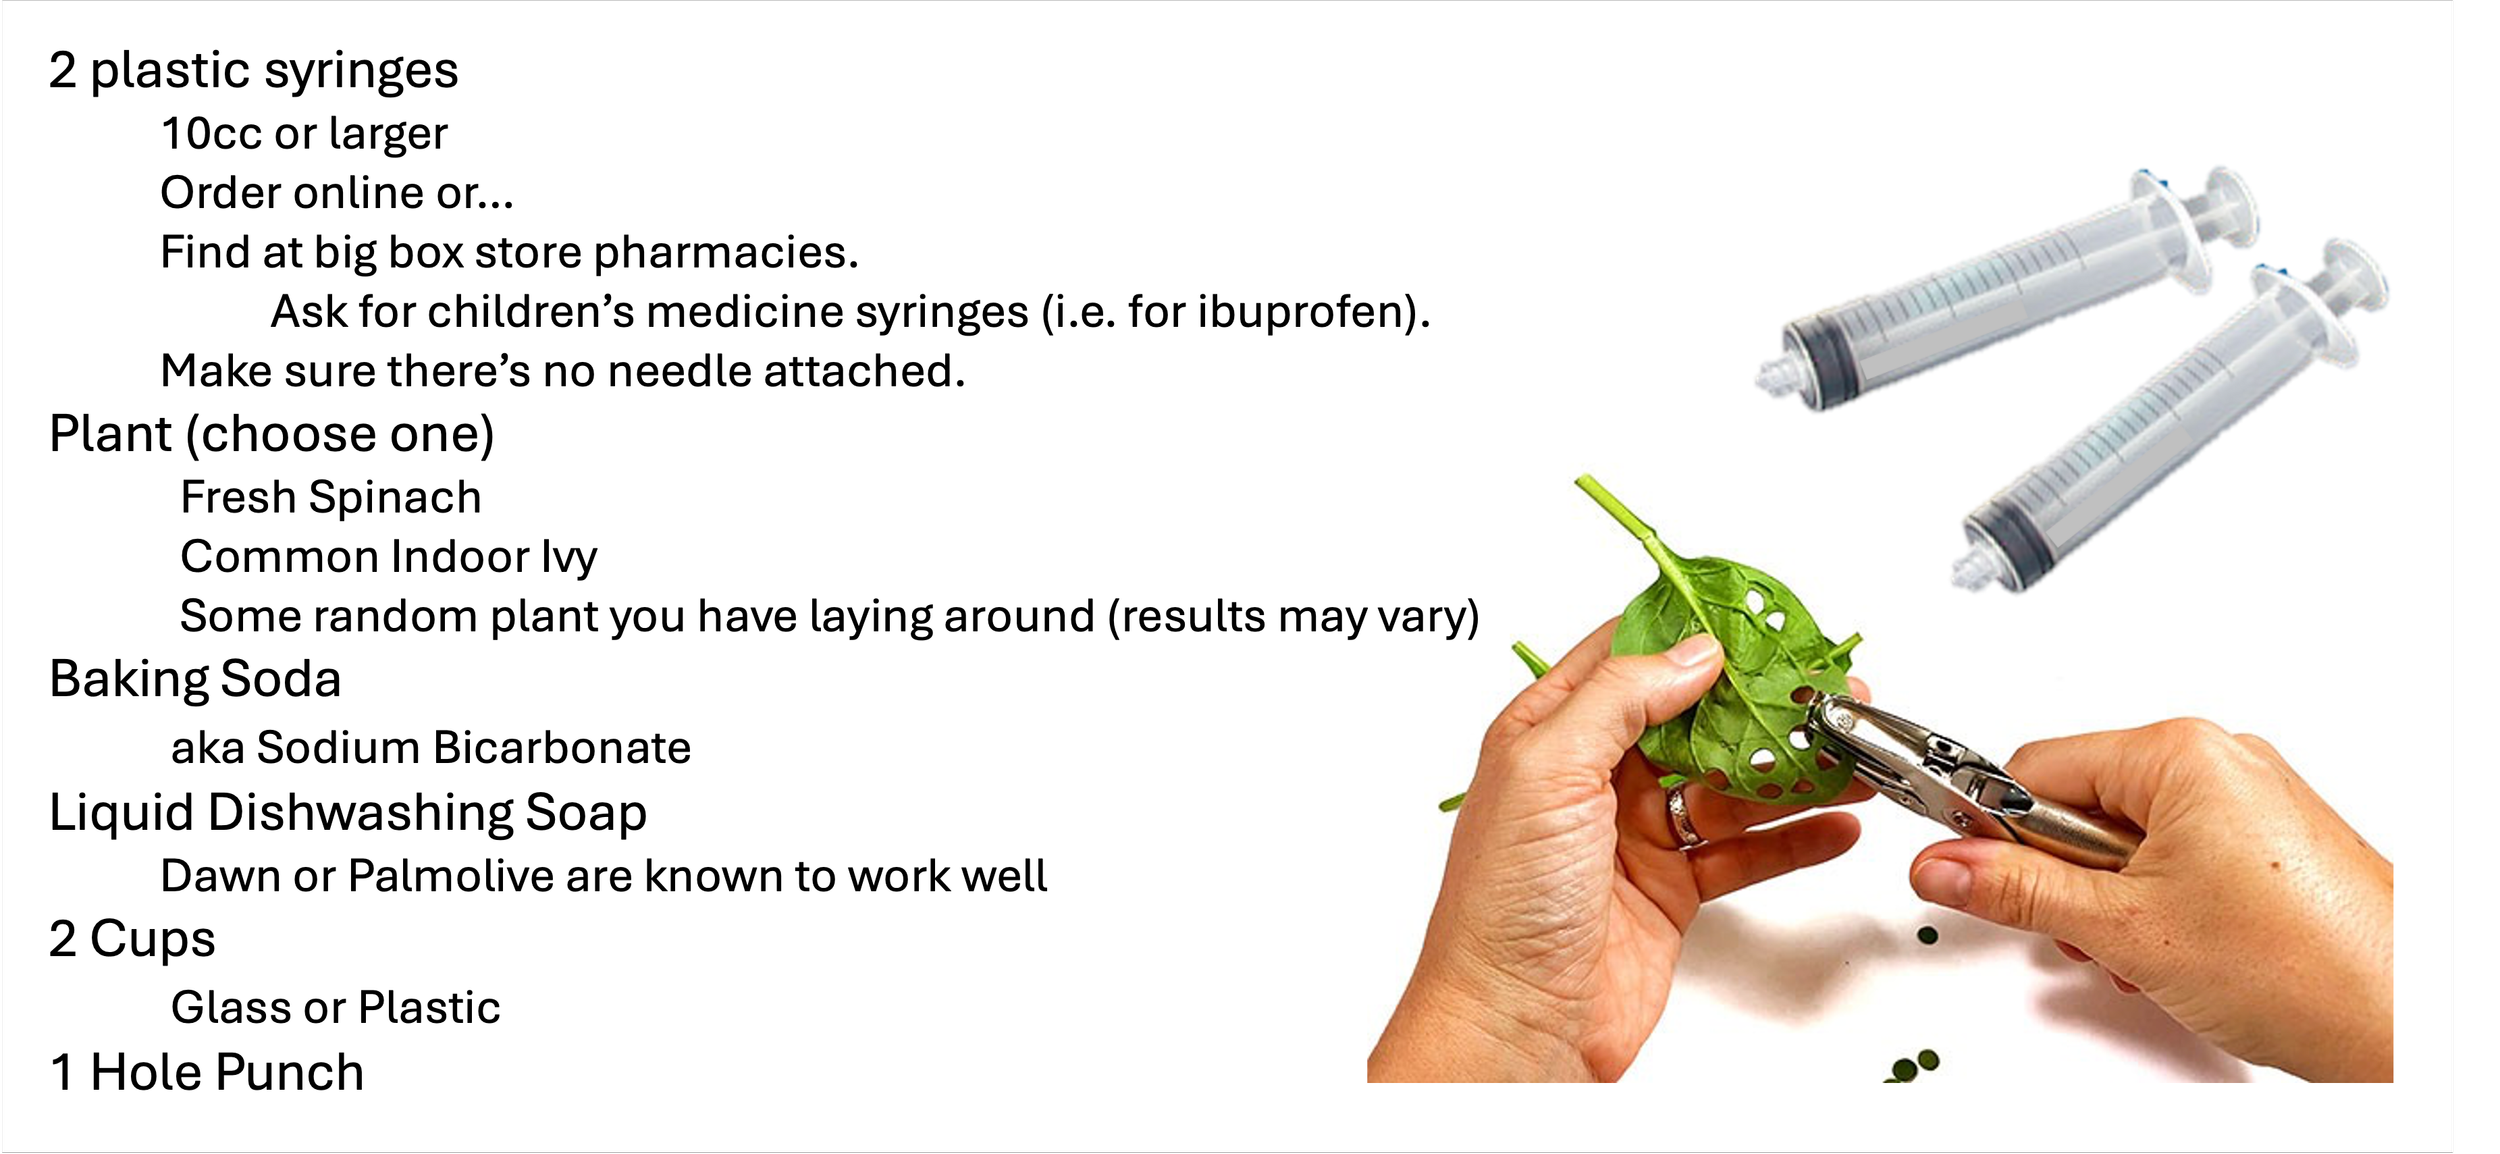
Supplies Needed
For the upcoming experiment you will need to gather some supplies, some of which you may not have around the house. For example, you will need a 10cc syringe. Sounds difficult, but it isn’t. You can order them with online shopping. I have found them at big box stores in the Pharmacy section. Just ask for the syringes that are used to administer medicine, like ibuprofen, to children. They also come in the children’s ibuprofen over the counter. If you have kids in the house, chances are you have a syringe. Be sure the syringe has the needle removed, if there is one. Below is the list of supplies you will need to conduct the experiment portion of the lab.
Photographic Evidence
Experimental Set Up
Once you have gathered your supplies, you will need to take several photos. First take a photo of your experimental setup for documentation purposes. It should look something like this.

Sunken Leaf Disks
The hardest part of this lab is to get the leaf disks to sink. Be sure to let all of the air out of the syringe. Place your thumb firmly over the opening and pull. While you pull, swirl or shake the syringe. If you do it correctly, you should see the liquid bubble. It is actually boiling at room temperature due to the difference in pressure. Pull it back a quarter to a third of the way and release your thumb. You should hear an audible pop. It may take five or ten times to get all of them to sink. If that doesn’t work, you need to find a leaf from a different plant. You can do it. I promise.
Once you successfully get all the leaf disks down, take a photo.

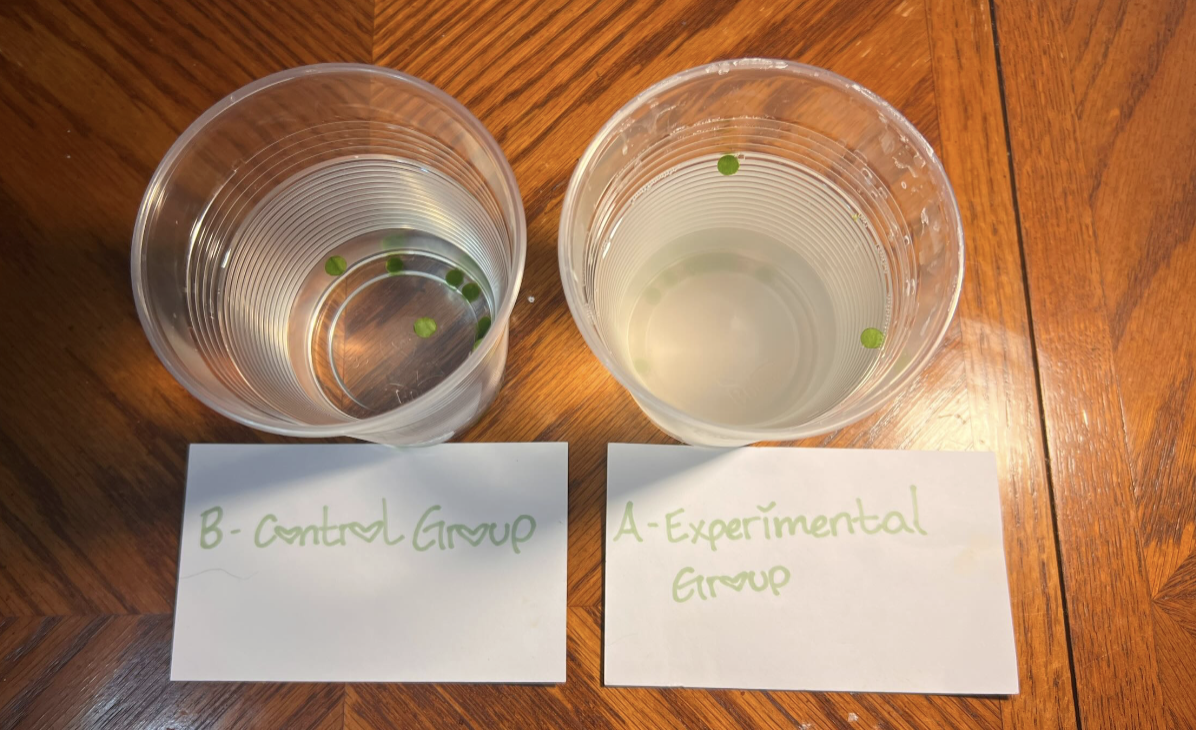
Minute 20: End of Light Trial
At the end of the 20 minutes the leaf disks are exposed to light, take a photo of both the experimental and control group.
Minute 40: End of Dark Trial
After the additional 20 minutes your leaf disks are exposed to dark, take one last photo.

Video: How to conduct the leaf disk assay

Submit Your Lab
Be sure to combine all pages of your lab (exercises and experiment) with the required photographic evidence and create a single PDF. Submit to the Lab Submission link Canvas by the deadline.
Quiz: Photosynthesis
Complete you quiz by the deadline in the class calendar.