
Lab Instructions: Central Dogma of Molecular Biology
Lab: Nucleotides, Nucleic Acids and Proteins
Use the notes below to avoid common mistakes. Detailed experiment steps follow the exercises.
General Rule: Anything inside rounded boxes and anything marked with a ☑ is graded. Do not skip these.
Exercises
Exercise A: The Central Dogma of Molecular Biology
This section is straightforward. Focus on completing all graded boxes and check-marked items.
Exercise B: Nucleotides and Nucleic Acids
Figure 3: Circle the structural differences between deoxyribose and ribose. You should have two circles total.
Figure 4: Circle the differences between thymine and uracil. Again, two circles total.
Problem 5: Phosphodiester Bond
The instructions are wordy. Use the provided GIF as your guide for forming the bond.

Figure 6: Partial Charges
Label δ+ on hydrogens
Label δ− on oxygens and nitrogens
Exercise C: Amino Acids and Peptide Bonding

Problem 9: Peptide Bond
Draw two amino acids side by side
Remove the correct atoms to form a peptide bond
Note: These are the transcribed amino acids, not the peptide bond. Do not use this image on Problem 9. You must complete the peptide bond using the information in the lab.
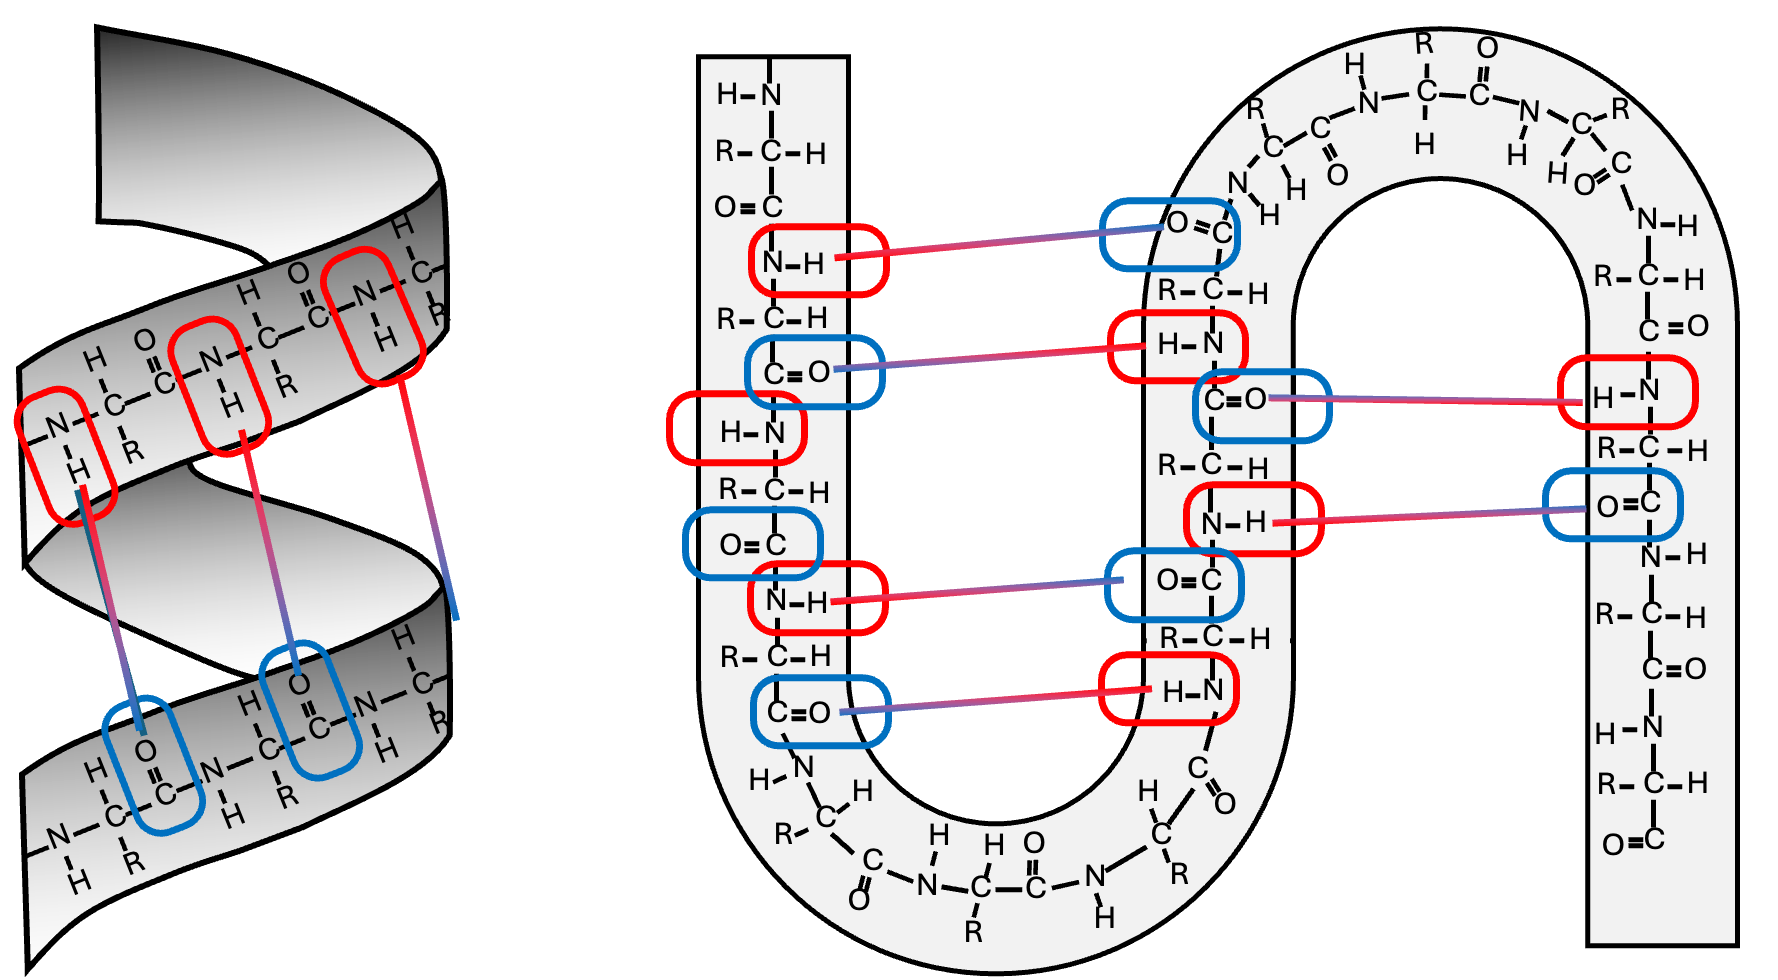
Figure 8: Hydrogen Bonding (Secondary Structure)
Hydrogen bonds form between:
δ+ hydrogens (amine group)
δ− oxygens (carbonyl group)
Draw the bonds connecting these groups.
Experiment 1: Enzyme Function
Step 1: Preparation
Gather materials and set up your lab.
Materials:
3 large cups or bowls
3 small cups (must fit inside larger containers)
Thermometer (optional)
Lemon juice
Ice
Stove/range
½ apple
Knife
3 plates
Grater

Step 2: Setup Photo
Take a clear photo of your full setup. It should look something like this.
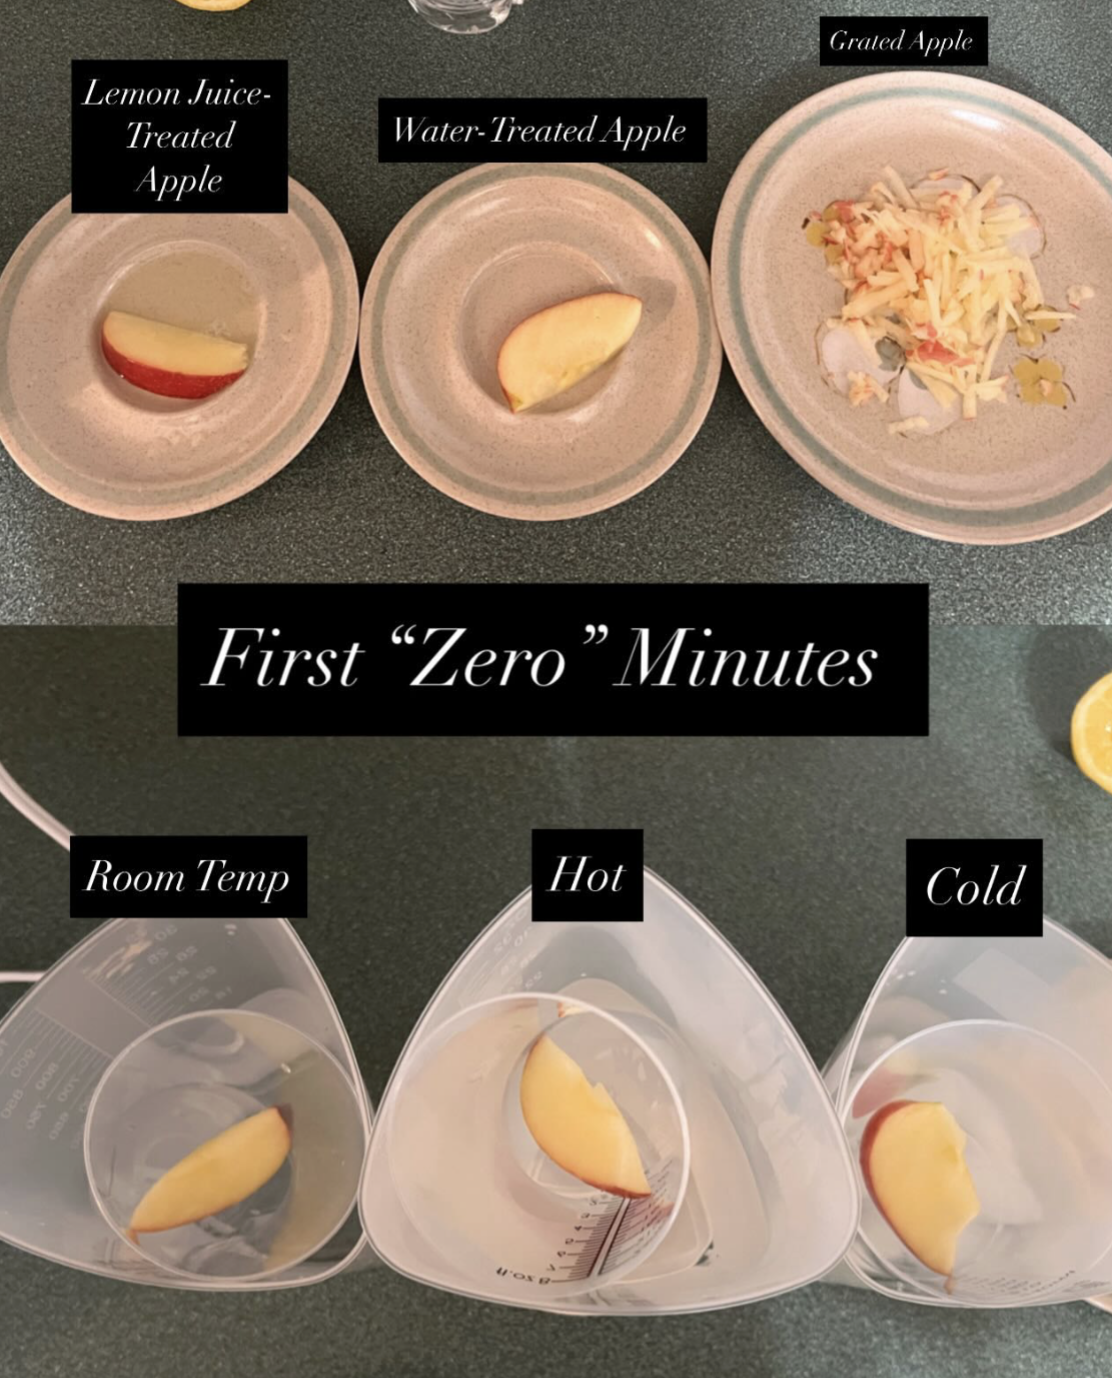
Step 3: Minute 0 Photo
Take a photo immediately before starting the experiment.

Step 4: Final Photo (45 minutes)
Take a photo at the end of the experiment.e lab and complete the conclusion.
Step 6: Record Data + Conclusion
Complete all required sections in the lab.
Step 7: Submit as PDF
Combine your lab work and photos into a single PDF.
Step 7. Create a PDF of your lab.
If you need help, look in the Start Here module. Be sure to include your photos in the PDF. Failure to document your experiment will result in a zero for the lab.